Showing posts with label pie. Show all posts

Monday, June 7, 2010

Baking Adventure #23

Alright, alright... I will write another blog post! You don't have to be so cruel... hehe. Just playing. But really, I am SO sorry for taking a month "off" of blogging. Baking has still occurred but life has just gotten in the way lately... imagine that?!

See below for evidence of MUCHO baking-o that happened:

AND NOW FOR THE MAIN EVENT!!!

This week's baking adventure actually occurred.... ohhhhhh about 2 weeks or so ago. *Bad Ashley* My dad is ruler of the roost and has arguably a larger sweet tooth than myself (combined, we are dangerous in a bakery or candy shoppe or FUDGE shoppe in Helen, GA that shall remain nameless to keep all those involved safe... just playing. Or am I?). Anyways, my grandmother was an amazing cook and BAKER and even though she has passed, her legacy lives on.... as do my dad's memories of the delicious pies she used to make. For a few months now, my dad has been requesting three in particular said pies: Coconut Cream, Banana Cream, and Chocolate Cream. As you saw in the slideshow above, I conquered the Coconut Cream pie and the Chocolate Cream Pie will come soon... me thinks. Which then leaves pie request #3...


Even though the pie order listed above doesn't reflect it, the Banana Cream Pie was my first stab at his requests. I found the recipe on Delish.com (shocker!) and altered it slightly. You'll find out shortly how it was altered... aka I cheated. Whenever looking for recipes, I'm mostly drawn to the simple ones with minimal ingredients but maximum taste and reviews.

First things first, per usual. PREP the ingredients. Otherwise you'll be running around the kitchen like a chicken with your head cut off... much like I did when making the Cinnamon Raisin Bread for the SECOND time.

After prepping the ingredients, whisk the milk, corn starch, sugar, and salt until dissolved. Allow the mixture to thicken and boil while making sure to stir constantly. (You'll see in a bit that I kind of neglected this part of the instructions and had some of the custard stick to the bottom and then make it a little lumpy... Hey! It still tasted good though!)

While the custard is beginning to boil (or before if you don't want to be a rebel like me), dice up 3 of the 4 bananas.

And divide in half, as you will be making two layers of 'nanners (or dice up 1.5 bananas at a time so you have an EXACT measurement if you're an anal mathematics nerd like me).

Next it's time to take the pre-separated and whisked egg yolks and add some of the hot milk to them SLOWLY, VERY SLOWLY, WHISKING THE ENTIRE TIME so that you temper the egg yolks before adding them back into the saucepan of hot milk. (Tempering keeps the yolks from curdling people... you don't want scrambled eggs in your pie do you? Yea, me neither.) Keep stirring the quasi-custard until it thickens enough to coat the back of a spoon thickly (Think pudding consistency).

Once you reach the consistency you want, then remove the saucepan from the heat and stir in the butter and vanilla extract (I don't feel the need to spend oodles of $$$ on vanilla beans just yet).

[I must apologize for the lack of pictures during this process but everything happens so quickly and unfortunately, I do not have a third arm or sous chef/photographer to help. Any volunteers?]

Transfer the custard to a medium bowl and press plastic wrap down onto the top of the custard (so it's actually touching it all over) and place in the fridge to cool. While the custard is cooling, arrange half of the bananas you cut earlier in the bottom of the cooled pie. [Where did this miraculous pie crust come from? This is where I cheated (yet again). I bought it pre-made in the Frozen foods section of the grocery.]

Then, once the custard has chilled and set some in the fridge, layer half of the custard on top of the first layer of bananas.

Add another layer of bananas and then a second layer of custard. Place plastic wrap around the top of the custard again and place back in the fridge to cool completely (a few hours or overnight if you wish).

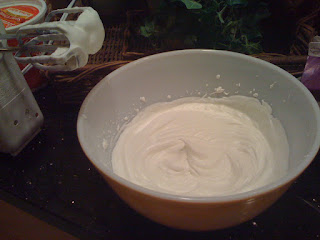
When ready to serve, make the homemade whipped cream. (I whipped it a little stiffer than normal.) Pile on top of the cooled custard pie and then layer the last sliced banana on top...

Admire for 2.5 seconds before diving into a big slice of Banana Cream Pie goodness!


I did warn you it was a big slice right???

Ok, ok... this may have been a few slices. hehe.

I hope you all can forgive me for being away for so long! I have also been trying to diet a little (it is bathing suit season afterall), so the baking has been less experimental as of late... gotta avoid sugar intake as much as possible. Until next time my friends! Thanks for hanging in there while I was away!

Monday, May 3, 2010

Baking Adventure #22


How many of you have heard of Lyme Disease? What do you know about it? Most people only know one thing: That it originates from ticks.

Some wonderful people have been banding together in support of Lyme Disease Awareness and have declared the month of May: Lyme Disease Awareness Month. In honor of this month, they have decided to paint May "Lyme" green and put together some amazing PSA ads. (You can view them here: http://www.youtube.com/user/lymenaide) If caught early enough, Lyme Disease can be treated pretty easily with antibiotics. However, sometimes the symptoms don't show up for months or even years and can ultimately lead to serious, long-term health problems.

Now, you're probably asking yourself why I have decided to partake in this cause. Aside from the fact that I love seeing younger generations banding together and making a difference, this particular cause hits close to home. An old friend of mine's sister has been battling Lyme disease for 3 years now. She is an absolutely beautiful girl and had the world at her fingertips when this horrible disease took its toll on her body and turned her world upside down. She is on the road to recovery but the battle hasn't been easy. (You can read more about Teri on John Raser's Causes page of his website: http://gospeedraser.com/causes/ and his blog: http://gospeedraser.com/golf-blog/)

I have never personally met Teri but I went to grade school with John, and through the world of the internet, we have been able to stay in touch. If Teri is anything like her brother, then this girl is beyond amazing, and my hope is for this blog post to raise awareness of the horrible disease that has affected their entire family.

So without further ado, it's time to paint the month of May Lyme with a scrumptious little baking adventure...


Key LYME Pie


I got this recipe from a website shown to me by a client. ThePioneerWoman.com has some incredible looking recipes and the Key Lime Pie was the first one I decided to make. The ingredients were minimal:


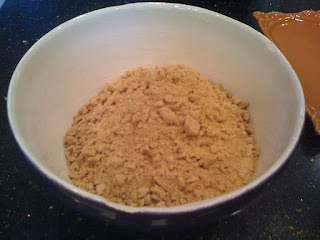
Then came time for some crust making. The recipe on the website calls for a food processor to turn the graham crackers into crumbs... well, I don't have one of these, so I crushed them the old fashioned way with a plastic ziplock bag and a heavy wooden mallet.

After the graham crackers were crumbled, it was time to add the sugar and melted butter.

Press into the pie pan (ungreased).

And bake in the oven for about 5 minutes and let cool.

While the graham cracker pie crust was cooling, it was time to make the filling! I can't even begin to tell you how excited I was to find REAL key limes at the grocery! For never having even seen them in person nor knowing how much they would cost, I was a little worrisome. HOWEVER, my favorite grocery came to my rescue and they were only about $2-3 for an entire bag!

[Please notice the Key Limes are on the right and regular limes on the left.]

When first attempting to squeeze the juice out of the key limes (yes, squeeze by hand b/c I do not have a juicer... I seriously doubt these little boogers could fit in a juicer anyway), I only got three, maybe four, drops out of it...

The recipe called for 1/2 cup of key lime juice so that certainly wasn't going to work! After putting my thinking cap on [Elementary school throwback], I remembered the PERFECT kitchen utensil for crushing small things with little holes in it: my garlic crusher!!! It was a perfect fit and thus allowed for mega juicing of the key limes!

TIP: This recipe also calls for a large amount of key lime zest. Make sure you zest the limes prior to juicing.

Once the 1/2 cup of juice was obtained, I blended the 2 egg yolks, lime juice, lime zest, and can of sweetened condensed milk with my hand mixer.

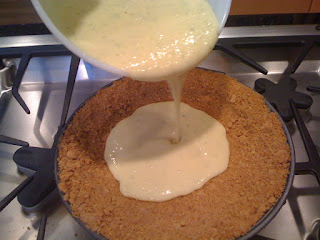
Then poured into the prepared Graham Cracker crust.

And baked in the oven for approximately 20 minutes. [The recipe says 15, but mine needed some extra time in the oven to make sure it was no longer "jiggly" in the middle.]

Once the Key Lyme Pie is baked, allow it to cool on the counter for about an hour and then pop in the fridge. I chose to let it chill in the fridge overnight because I love icebox pies EXTRA chilly, but to each their own.

Once cool enough, enjoy the Key Lime-y goodness. I guarantee you won't be able to just have one slice. There's something about the combination with the super tart key limes and the sweet graham cracker crust that just makes it irresistible.


***If you are interested in reading more about Lyme Disease or simply donating to or supporting the cause, below are two websites dedicated to the fight against Lyme Disease:
In addition to spreading awareness with this simple blog post, I will donate $0.50 for each person who comments on this blog post during the month of May to help the cause (up to $100). So please comment and feel free to donate or at the very least repost the above links to your friends and family! Together, we can help those affected by Lyme Disease.***

UPDATE: So this pie was SO good and such a hit that I decided to make another one for Cinco de Mayo. I changed the crust recipe slightly: used 16 graham crackers instead of 18. There was no overflowing mess of crumbs this time when pressing into the pie pan and it was equally as thick and delicious!


Thank you to everyone who has commented and reposted the link to this blog so far. The comments and stories are beyond humbling! Keep them coming! Together we can make a difference... EVERY LITTLE BIT HELPS!

Monday, April 5, 2010

Baking Adventure #19

A day late posting this week's baking adventure but for good reason! Life has been INSANELY and AMAZINGLY busy the last week, so please excuse me if this post is misspelled (thank God for spellcheck), uses poor grammar, or is just plain bland. The recipe for this week's adventure was my grandmother's so I will try my best and do it good by providing an enthusiastic post!

This Easter season was filled with my confirmation into the Catholic church and great times with friends (new and old) and family, so it was only appropriate to celebrate the Easter holiday with a recipe from my grandmother, who is peacefully resting in heaven...


Strawberry Pie


If you notice from the specials in the produce section at the grocery, Strawberries, among other fruits, are very much in season right now! In fact, the grocery where I bought my ingredients for the recipe had 4 pints for $5! WOOHOO!

First things first: Prep...

[Insert picture that I forgot to take here. Please don't hate me. Mentally picture strawberries, strawberry gelatin, sugar, corn starch, and a Pillsbury pie shell (can't find a recipe that is better than premade).]

First, I baked the pie shell in the oven at 400 degrees for about 12 minutes like the pie shell packaging suggested. While it was cooling, I hauled and halved the strawberries...

Then layered them as neatly as possible into the baked pie shell.


Next, I combined the sugar, water, and corn starch in a pot over medium heat and stirred until thick. This took about 15-20 minutes of some TLC... TLC meaning stir and let sit for a minute or two, then stir and let sit again. Looking back, I probably should've let it get a little thicker, which is a takeaway for next time!

After the sugar starch was thick, I added the strawberry gelatin and red food coloring to make a gel and poured over the strawberries while still hot.


Another takeaway for next time: buy a DEEP DISH pie shell!!!... Strawberry goop kind of overflowed... and by kind of, I mean there was strawberry yumminess all over the counters! So much so that I had to place the pie on a pizza pan while it set in the fridge.


After the pie set for a few hours, I made some homemade whipped cream (*as grandma smiles down from heaven*) with heavy cream, powdered sugar, and a touch of vanilla!

Please note that homemade whipped cream doesn't save well, so prepare it right before serving. It was the perfect addition to an amazing Strawberry Pie! There are requests already to make it again soon. It's looking like a few great people at church are going to be getting this the next time as well!


[The pie crust was no match for the strawberries' strength but if you look hard enough you can find the little guy under there somewhere.]

Hope you all had an amazing Easter holiday and were able to celebrate with those near and dear to your heart!

Oh, before I forget! I made some cookies too as a "thank you" to some people at church for their amazing help and support throughout the RCIA process. Check out the little goodie bags:


Until next time my friends! Muah!