Showing posts with label bake. Show all posts

Sunday, February 14, 2010

Baking Adventure #14

What a co-inky-dink!... this is baking adventure #14 and today is the 14th day of February! I promise that was not planned at all!

This week's baking adventure held true to the definition of "adventure". I had to cross the Atlantic Ocean for this one... A friend of mine was raised in Germany and has been craving a particular cake for quite some time now. He requested it back in the fall but it never actually happened for one reason or another. However, this week the craving finally became unbearable and he not only put in a "real" request but he also dropped by the CA$H for me to make it... making him my 3rd paying customer!!! YAHOO!!! Movin' on up!

Anyways, let's get down to it! This week's baking adventure is...


BIENENSTICH CAKE (Bee Sting Cake) <---- Please don't ask me how to pronounce it.


Luckily, since my friend requested this cake in the fall, I had already done a good bit of legwork trying to find the right recipe that held true to the German tradition while also being translated into English baking terms properly... this was a feat in itself! [Gotta love the metric system we Americans use. Nothing like being difficult.]

I searched long and hard across the internet and even consulted a former Project Manager from a previous job of mine, who was also from Germany. His recipe was half German and half English. I about went cross-eyed trying to figure it out... Finally, a few days ago I settled on this recipe for BIENENSTICH (Bee Sting Cake). It made the most sense and even the few steps left out I could figure out on my own.

Once I went to one of my favorite stores on earth, the grocery, it was time to PREP and then being baking.

This recipe involves three parts. The first of which is making the actual cake. This, my friends, was the easy part! You know, your usual separation of the dry and wet ingredients and then combine to make the batter.

The batter was a LOT thicker than I'm used to for typical cakes and only filled up about 2/3 of one round cake pan, so it made me quite nervous to bake. The recipe called for 3 tbsp of baking powder which meant that it was going to rise significantly... and rise it did! (Reference photo a little further down for this action!)

Before baking, the recipe called for making part two of the Bienenstich. Part two involved almonds (I used sliced instead of slivered. Makes for a prettier presentation.), sugar, cream, and butter. Once all of those ingredients were melted together, you're "supposed" to spread it on the top. However, I don't have a spring-form pan and had to improvise by placing the almond sugary goodness on the bottom of the pan and then the batter on top.

[If you look closely, you can kind of see the almond sugary goodness along the sides.]

[The cake literally looks like it was stung by a bee and then swelled up.]

While the cake baked and then cooled, it was time to venture into part three of the Bienenstich. This was by far the most cumbersome and difficult thing I've made so far in all of my baking adventures.

First, I had to separate the egg whites and egg yolks (not so difficult). I like to use the shell to help divide them. In order to do this, you crack the egg in half and open it over a bowl while holding the yolk in its shell. Then, you pour the yolk into the other shell you're holding back and forth until all of the egg white is in one bowl. Once done, put the left egg yolk in another bowl. [See below]


The next part of the recipe called for scalding milk (I used a microwave to do this! It took about 3 stints of 45 seconds each in the microwave to get it "scalding" hot. Not sure what scalding means? If you touch it with your finger and feel like your skin is going to burn off if you hold it in any longer than a split second, then that's scalding hot. REAL technical, I know. hehe)

After pouring the scalding hot milk into the egg yolk, sugar, and corn starch mixture while stirring constantly (READ: and getting milk everywhere b/c the mug holding the milk decided to have it pour down the side. NOT COOL), it was time for the double-boiler! What's a double-boiler you ask? Funny thing is I've never seen nor used a real one BUT! I do know how to make a makeshift one using a glass bowl and a pot of boiling water. [See below]

This next part was a PITA. (Want to know what that means? Feel free to comment and ask. It's an Ashley-ism is all I'm saying.) You have to stir constantly the egg yolk mixture while it sits over the double-boiler being careful not to let it boil until it thickens and becomes almost like a thick pudding. This definitely took about 15-20 minutes of stirring and then letting it sit on its own for a minute and then stirring profusely again.

EVENTUALLY, (if your hand doesn't fall off) you will get a texture and pudding like consistency as seen below.

After the thick almond cream is done. Remove from double-boiler (the recipe does not say to do this). Then, whisk the egg whites (sitting off to the side from the step above) until stiff peaks form. This will take about 5 minutes or so of beating on HIGH and a pinch of salt.

Next it was time to FOLD in the egg whites with the almond cream... I don't have a spatula so I used a plastic spoon. Make sure you don't over mix or else your stiff peaks will fall, and the final whipped almond cream won't be as stiff as it needs to (I did this and had cream EVERYWHERE when layering the cake).

After the cake cools and the almond whipped cream has time to set in the fridge, it's GO time! Cut the cake in half and then layer the cream in between and place the almond encrusted top back on... and you have a nice yummy BIENENSTICH Cake (Bee Sting Cake).


Delivery of this cake was a bit nerve-racking (insert: A LOT nerve-racking) as not only was it to be eaten by one TRUE German, but it turned out there were two additional ones awaiting the Bienenstich's arrival. They had me sit while they tasted it and the only negative feedback was that it needed "more cream"... aka "Ashley let the whipped cream set longer in the fridge or it all will come oozing out when layering on the cake".

That's it for this adventure! My hands are officially red and sore from all the egg whisking and stirring but it was more than worth it. That daggon' Bee had nothing on the Pint-Size Baker!

Hope ya'll have a very happy Valentine's Day whether you're spending it with a significant other or close friends and family! XOXO

Oh!!! Before I forget...

P.S. I made some of my "Sweet Ashley's (more addicting than crack) Choco Chip Cookies" for a Valentine's Day gift to my family. Too bad we can't eat with our eyes huh???

Sunday, October 4, 2009

Baking Adventure #3

Have you ever spent 20 minutes at the grocery searching for one item? This hasn't happened to me for quite some time as the grocery and I are BFFs; however, Friday night proved otherwise...

Upon looking over the recipe, I noticed that most of the ingredients were pretty common and thus, have most in my baking cabinet already. However, I was running low on sugar, eggs, and butter, and had not yet added vegetable shortening or Cream of Tartar to the mix... so it was off to the grocery for this Pint-Size Baker.

Once down the baking aisle, the sugar and vegetable shortening were a quick find. However, Cream of Tartar was no where to be found. Maybe I should've done a little more research before going to the store because I didn't even know what it looked like. It could have been a solid, a liquid, a powder type substance... I had NO earthly idea. After about 5 minutes of searching the aisle, I decided to go to customer service and ask for their helping in finding Cream of Tartar. "Excuse me, where can I find the Cream of Tartar?" I asked. "[With a little chuckle] You can find that down aisle 6, where the condiments are," the lady at the counter explained. So off I went down the aisle giving her the benefit of the doubt for knowing what Cream of Tartar was... yea that was a mistake. She thought I meant Tartar Sauce! After laughing to myself, I started back towards the baking aisle and ask a fellow customer if she knew what it was/looked like. She explained that it would be in with the spices. AH HA! That narrows it down significantly! Back in the baking aisle, I began to scan the 8374238472634 spices for Cream of Tartar... typically they're placed alphabetically, but I wasn't sure if it was under "C" or "T". There was another gentleman in the aisle not having any luck finding what he needed either, but I decided to see if he knew where it would be. He immediately goes "one second!" and went down the soup aisle. While he was in the other aisle, I ended up finding the Cream of Tartar on my own and then found him to let him know. Well, guess where he thought it would be... in with the Cream of Mushroom and Cream of Chicken soups... This was quite a start to the third baking adventure!


Ok enough story time... time to get down to business and let you in on what was on the agenda for this week's baking adventure...


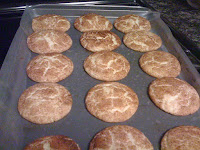
If people don't know what these are, they're basically sugar cookies on crack! Buttery, cinnamon and sugar goodness! I would highly recommend baking these as they're super simple and very difficult to mess up if you follow the recipe. My biggest challenge in baking these was mixing and baking double the normal batch...

Why did I bake double you ask? Well, I had my FIRST PAYING CUSTOMER!!! :-D WOOHOO!!! In my ideal world, this little baking hobby would turnout to be lucrative at the same time. Who doesn't want to be paid for doing what they love? :-)

The first step in the process is always PREP. The ingredients are pretty minimal for these cookies and are mostly common, household pantry items. Please pay no attention to the vanilla extract in the picture below. It decided to jump in uninvited to the Snickerdoodle Cookie party. Bad Vanilla Extract, Bad!

The recipe calls for sifting the dry ingredients together in one bowl and blending the wet in another per usual. This was the easy part...

After the two bowls contain their corresponding ingredients blended together, it was time to add the dry into the wet. Well, if you're like me and don't have an electric mixer or anything besides a spoon and your hand, this is QUITE the workout and leaves a nice red hand afterwards.

Once the dry ingredients were combined with the wet, it's time for the fun part! Make little balls of dough and then roll them in the cinnamon and sugar, place on baking sheets and bake for approximately 10 minutes. A tip for the balls of dough is to roll them in between the palms of your hands (make sure you wash them) like you would making balls of play-dough when you were little, and then place in the cinnamon-sugar and take a spoon and spoon the cinnamon and sugar on and around the dough. Try and minimize the amount of time your hands/fingers touch the cinnamon and sugar as you will start to stain the raw dough, and with these cookies, it's important not to blend those two parts together.

This recipe is supposed to produce approximately 4 dozen cookies (or 48 total), but since I was doubling the recipe, I ended up rolling, cinnamon-sugaring, and baking 106 total cookies!!! Needless to say, I got a great workout and my kitchen and apartment were quite toasty when done! In fact, the apartment thermostat said 81 degrees when I was finished and it was on 74 when the adventure began.

After the cookies were cool, I packaged up 48 of them for my paying customer and put the rest in my regular tupperware to share with family and friends. Then it was off to deliver the Snickerdoodles to the paying customer and watch my Irish kick some football butt!

That's it for this week folks, please leave comments below OR if you want to be my SECOND paying customer, please inquire within! ;-)


Next week's adventure has already been determined and I can't wait! One of my best friend's has shared one of her favorite recipes with me, so next week will be a dedication to her and her shared love of baking!

Thursday, October 1, 2009

[Double] Blueberry Cornbread update


Ok folks... I have some sad new for you...

As delicious as the [Double] Blueberry Cornbread was, it was no match for the moisture that arose from the blueberries and humidity in Atlanta. After only 3 days since creation, the cornbread has suffered a fateful death in the trash receptacle. *tear* This brings great sadness to not only myself but my father as well as this was to be his breakfast each morning this week.

Why such a short-lived baked good? There's a little disease the resides among baked goods and eventually, given enough time, will take over them all if not consumed in ample time. This disease is better known as...

You might want to sit down for this...


MOLD!!!!!!!!!!! [insert gasps here]


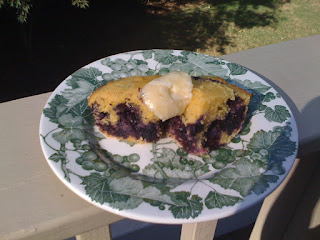
Yes, ladies and gentleman, the beautiful and wonderfully delicious Double Blueberry Cornbread grew a beautiful BLUE mold to color-coordinate with the fruit inside. It's a sad day, but fret not! There will be more baking to be had this very weekend!!!

Until then, rest in peace Double Blueberry Cornbread. You were loved by many. Please feel free to leave your condolences in the Comments below.

Double Blueberry Cornbread is survived by its dutiful companion Honey Butter.

Sunday, September 27, 2009

Baking Adventure #2

Fall is officially here, which means there are some amazingly delicious fruits and vegetables that are in their prime right now: apples, figs, pumpkins, squash, and BLUEBERRIES!!! (to name a few) Blueberries are extremely good for you as they are high in anti-oxidants, not to mention that they're absolutely delicious. Thus the reasoning behind my search for the best way to utilize their magnificentness. (In case you haven't noticed, I like to make up words.)

When searching for the recipe, I kept coming back to this Blueberry Tart recipe by Paula Deen. However, I have kind of been sweeted out lately and wanted to find something with blueberries as the star but a non-sweet/dessert. This was not an easy task until the other night my dad was having a conversation with a friend about how much he loved cornbread, but he also mentioned blueberry cornbread. Now, the "AH HA!" moment did not hit until about 5 days later while sitting at work to put two and two together, but I'm sure glad it did.

After doing some research online and reading through various recipes of simple cornbread and cornbread with jalapenos and cornbread stuffing, I finally found a blueberry cornbread recipe that struck my fancy. So without further ado, allow me to introduce this post's baking adventure...


As you can see from the link above, the recipe is pretty simple. There wasn't much prep beyond purchasing the ingredients and rinsing the blueberries. However, one thing to note when purchasing the Yellow Cornmeal for this recipe, make sure it is not the "mix". The "yellow cornmeal mix" already has baking soda, salt, and flour added. Your final product would be too salty and just a mess. Use "PLAIN" Yellow Cornmeal.
Now, the recipe states you can simply increase the amount of cornmeal to sub for not having masa flour. My grocery did in fact have masa flour, but the bag was as big as my head and I'm not baking for 200, so I opted to follow the side note about increasing Yellow Cornmeal.

Once the wet ingredients and dry ingredients have been mixed and blended in their corresponding bowls, it's time to stir them in together. Pretty simple! After fully saturating the dry ingredients in the wet, it was time to add the star ingredient: 1 cup of BLUEBERRIES!

HOWEVER, after gently folding in the blueberries to the cornbread mixture, I decided this was certainly not enough to make such a wonderful fruit stand out, so I dumped in the rest of the pint... What could go wrong right?


After greasing the 8"x8" square pan and pouring in the batter, it was time for the oven. Bake at 375 degrees for 20-25 min? Sure! No problem; I'll just clean up the kitchen while the DOUBLE blueberry cornbread bakes...

25 minutes later, I stick in the wooden skewer (ref. my Baking Adventure #1 post about wood vs. plastic or other materials)... and what do I find (much to my dismay)... the skewer comes out with batter on it, which means back in the oven to bake for a while longer!

After about 40-45 minutes of baking (checking every 5 min to see that it doesn't over bake), the skewer FINALLY comes out clean when placed in the middle of the blueberry cornbread.

Next, it's time to cool and relax, then enjoy!


THE END...


Or was it? After the cornbread cooled, I tasted a little sample and wasn't terribly pleased. The cornbread was decently moist but didn't exude much flavor or sweetness. (The recipe calls for 1/4 cup of sugar, which would leave one to believe it might be a sweeter cornbread... not so much.) Time to put my creative baking hat on and think... what goes well with warm cornbread? BUTTER... ok, got that... what is this double blueberry cornbread lacking? SUGAR... BY GEORGE I'VE GOT IT!!!

HONEY BUTTER!!! I returned to the grocery to buy some honey and got to work combining 1/2 stick of softened butter (aka 4 tablespoons or 1/4 cup) with 1 tablespoon of honey. After blending, the honey butter went back in the fridge to let it set. Let me tell you, I haven't had a more delicious butter in my life. (Secret: I always use salted butter even if the recipe calls for unsalted.)

After I found the magical solution to an otherwise mediocre Double Blueberry Cornbread, it was off to mom and dad's to surprise dad and see if it passed his stamp of approval. I warmed up the bread in the microwave and then topped it with the honey butter and served... DAD LOVED IT!!! I think he spoiled his dinner that mom would be cooking for us in a couple hours, but it was worth it. hehe


Ok, that's it for this baking adventure! Hope you have enjoyed! Not sure what the next one will be yet, possibly something with Figs as I've only eaten them a couple times raw and many times in Fig Newtons.

Friday, September 25, 2009

Next baking adventure has been determined!`


Stay tuned folks!

I've been going through recipes upon recipes the past week or so wanting to bake something with blueberries while trying to think outside the box and not do a dessert...
Last night it hit me! A convo with my dad about a week ago resurfaced in my brain, and I know exactly what I'll be making. Sorry to tease, but I must leave it as a surprise as my dad might be reading this and gotta keep you coming back right? :-) RIGHT!

Additional teaser: The blueberry, baked, non-dessert amazingness will be baked this weekend!!!

Friday, September 11, 2009

Pint-Size Baker at your service!

First off, thank you for reading this blog. To be honest, I don't know how many people will actually read this thing, but hopefully it'll help someone else in this universe who loves to bake as much as I do or even someone who is baking for the first time and curious about what to expect. I intend to share each baking experience good and bad with you. We can laugh and cry together! Isn't that fun? haha!

I've found that baking is an excellent source of therapy. You get to "roughly chop", whisk, fold, and blend ingredients together and create something relatively in a matter of minutes. However, you're not just creating anything; you're creating a delicious piece of art that brings smiles to people's faces and produces a euphoric happiness when consumed... yes, this may be a little extreme, but think about that first bite of your favorite chocolate cake or oatmeal cookie... AHHHmazing!

As a little backgroud, the name "pint-size" came from a friend's husband who has called me "half pint" since the minute he met me. (Thanks Dan!) Little did he know back then how much the name pertained to my secret love of baking (and cooking but mostly baking). So here we go ladies and gents... the "Pint-Size Baker" is off and running!

First baking adventure: Caramel Apple Cake courtesy of Food Network