Tuesday, December 29, 2009

Baking Adventure #10

In the words of Mrs. Doubtfire, "HELLOOOO!!!!!!" [Insert whipped cream face mask]

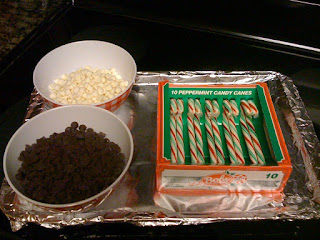
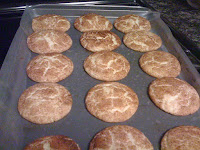
I hope everyone is having a wonderful holiday season and had a very merry Christmas! Lots of baking has occurred over the past couple of weeks including more peppermint bark, snickerdoodles, "trash" mix, a breakfast casserole, and...

This week's baking adventure:


This particular adventure was not only requested by my baby sister (she's 18, so not really a baby) and one of my devoted readers. We shall call him "Anonymous". Anyways, I must give thanks to my sister and "Anonymous", as this cake was a lot of fun to make and soooo tasty! (Random fact: up until exactly one week before baking the cake I had NEVER tried Red Velvet cake. *GASP* I know...)

A BRIEF HISTORY LESSON on Red Velvet Cake (as told to me by my bestie): Red Velvet cake came about as a result of water reacting with the minerals in cocoa powder back in the early 1900s. The reaction turned the cake batter red. (For a more accurate history lesson, please read here: http://en.wikipedia.org/wiki/Red_velvet_cake.)

Upon researching the best recipe to use for this adventure, I decided to reference two of them. One was from a Paula Deen recipe on FoodNetwork.com and the other (Cakeman Raven) was sent to me by a friend on Twitter, Kelle Kramer. The two recipes for the cake part were almost identical, but there was a slight difference in the frosting, so I decided to make my own while utilizing them for a reference...

PREP was a sinch. A little tip for ya: if you buy a 4-pack of food coloring, each one of those little guys equals about 1 tablespoon of food coloring.

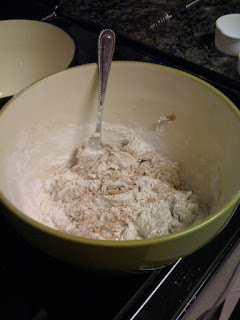
Next it's time to separate the wet and dry ingredients and then combine. I had a bit of an accident when combining the two but most stayed in the bowl! Hand mixer + stuck = a mell of a hess!

After the cake batter is a smooth texture, divide batter into two 9" cake pans about 2/3 full. I had some extra batter so I opted to make cupcakes as well! One problem with this, I couldn't find my liners ANYWHERE (later to be found right where I put them, grrr), so I decided to just Pam (read: vegetable cooking spray) the heck out of my mini-cupcake tins and hope for the best.

While the cakes and cupcakes were baking, it was time to make the frosting. Now both recipes called for 4 cups of powdered sugar and one called for 1 tsp vanilla extract while the other called for 2 teaspoons. I tend to like to make recipes my own if possible (unless it's already amazing, then if it ain't broke, don't fix it!). For the cream cheese frosting, I used one 8 oz. package of reduced fat cream cheese and one regular 8 oz. package of cream cheese along with 1.5 teaspoons vanilla extract. NOW, here's the kicker... I didn't listen to the recipe for the amount of sugar it called for. Remember that Red Velvet cupcake I tried the week prior? WELL it was still fairly fresh on my pallet, and what I loved about it was that you could actually taste the cream cheese and it wasn't overbearingly sweet. With that in mind, I ended up only adding about 2-2.5 cups of powdered sugar and it was [insert Italian accent] PERFECTO! MUAH!

While letting the cakes cool and placing some of the frosting in a piping bag (el cheapo from Publix), I decided to get creative and pipe the frosting onto the cupcakes and VOILA!

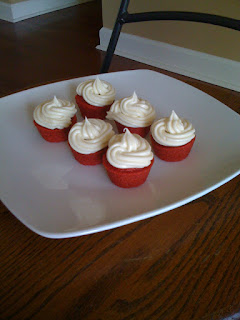
[A little secret about these cupcakes: they look better than they tasted. As a result of not having liners, the outside of the cupcakes were slightly crunchy... oopsy!]

Once the cakes cooled, it was time to frost. Here's another little hint for ya: you know how cakes are flat on the bottom and rounded on the top once out of the oven? Well, the last time I made a cake, I carve off the rounded part thinking it would make the cake more even... WRONG! After frosting it, the middle sank in, so this time I put the rounded side of one cake down, the two flat sides together, and thus the other rounded side was facing up. After frosting, there was no dip in the middle... PROBLEM SOLVED!

I put the piping bag to good use again was the cake was frosted to try my hand at decorating. (As we all know... this is NOT one of my strong points.) The piping turned out not too shabby around the edges so I decided to add a tree in the middle as well.

In order to add a little color and festiveness (is that a word?), it was back to the grocery for some green sprinkles and M&Ms!

and there you have it: Pint-Size Baker's Merry Christmas Red Velvet cake!!! Hope your mouth doesn't water too much. ;-)


Friday, December 25, 2009

Feliz Navidad

Merry Christmas everyone!!!

No post just yet as we're right in the middle of great times with the family! About to go watch "It's a Wonderful Life" and get grandpa to show me a few moves on the dance floor!

Hope you all are having an absolutely wonderful day with those near and dear to your heart!

Love,
Pint-Size Baker

Friday, December 18, 2009

The Decade in Food: Trends from 2000 to 2009

As you all know by now Delish.com is one of my favorite sites for recipes and general food knowledge. They even have fun quizzes once a week to test your food knowledge. Delish.com has put together a list of Food and Diet Trends over the past decade. How many trends have you been a part of?

The Decade in Food: Trends from 2000 to 2009 - Page 10

Posted using ShareThis

Tuesday, December 15, 2009

Chocolate Thinning Tip

[BEEP BEEP BEEP]

We interrupt this week to inform you of a tip/lesson that my sister learned this evening...

When melting chocolate for dipping things in (i.e. pretzels), do NOT attempt to thin it out with milk or it will curdle.

Below are a few pointers to help you out:
  1. Use a double boiler if you have one.
  2. If you don't have a double boiler, then place chocolate in microwave for 35 seconds, stir, then back in for 15 seconds, stir again. Repeat this until chocolate is smooth and melted.
  3. If you do not follow the above, you run a great risk of burnt chocolate.
  4. When attempting to thin out the chocolate, use a small amount of oil (1-2 teaspoons). Make sure you use Canola or Vegetable oil and NOT olive oil as it will affect the taste of the chocolate.
We now return you to your regular programming!

[BEEP BEEP BEEP]

Wednesday, December 9, 2009

Baking Adventure #9

Buon giorno!

I know I haven't been baking much the past few weeks, but in all honesty, I'm saving up for the Christmas season. There will be quite a few new adventures: peppermint bark, red velvet cake, and cookies, just to name a few!

This week's baking adventure is inspired by the Christmas season. This is hands-down my most favorite time of year (see THIS for reiteration)! With Christmas comes the celebration of the birth of Christ our savior, in addition to parties, decorations, and wonderful times spent with family and friends. Atlanta is home to the magnificent Macy's tree, and one day I intend on getting to NYC to see the biggest one of all lit up during this season.

Before we get started, I do have a confession to make... this week's adventure involves no baking whatsoever... STOP! HOLD THE PHONE! Did she just say NO BAKING?... That I did folks. However, this little treat is so wonderful it is included by way of the "Wonderful Treat" loophole. SO, without further ado, this week's baking adventure is...


(Brought to you courtesy of Delish.com. One of my all-time favorite recipe sites!)

This recipe is just as the title says "SIMPLE". It involves a microwave, a cookie sheet, and a refrigerator. I KNOW those of you out there who aren't particularly blessed in the baking realm would be able to handle this without a doubt! (Mom, this includes you!)

First things first: PREP! (Told you it was simple! hehe)

The recipe calls for crushed candy cane or peppermints. I went the candy cane route and chose a festive red and green peppermint candy cane to add a little more character. This recipe calls for 1/2 cup of crushed peppermint candy, which for me equated to about 6 full candy canes. Now, I don't own a mallet or any type of food beating device (otherwise known as a meat tenderizer), but I do own a rolling pin so it was time to go to town!

[Don't let the innocent face fool you. I'm full of strength and will crush a candy cane at moment's notice!]

Tip for crushing the candy cane: place in a plastic sealable bag prior to crushing (make sure you seal it), that way all crumbs and pieces are kept in one place as well as easily transferable to sprinkle on the chocolate.

After the candy canes are crushed into little bits and pieces, it's time to melt the chocolate in the microwave. Please note that while doing this, the bowl will get HOT and you will likely have a mess on your hands (literally).

I would recommend melting the semi-sweet chocolate first and then the white chocolate, as the white chocolate is a little finicky. Also, when melting the white chocolate, you might want to stir it a bit more than you did the semi-sweet chocolate as it wants to clump up... nothing a little stirring can't fix though!

After the chocolates are melted, it's time to spread the semi-sweet chocolate out on a foil lined cookie sheet and then drop tablespoons-full of white chocolate and marbleize...

This is where my lack of artistic ability comes in. To me the marbling of the chocolates looks like a big ole mess...

LUCKILY! The crushed candy cane comes in and saves the day by topping the chocolate and covering my imperfections! WOOHOO! [You're my hero! *sigh*]

After the Peppermint bark sets in the fridge for an hour, then the fun, breaking apart thing comes back to play!


And voila! There you have peppermint bark my friends! Simple, quick, and so easy, yet SO yummy! Store in an air-tight container up to a month in the fridge.

Hope everyone is having a wonderful Christmas season so far! I look forward to hearing from you soon! Until the next adventure...

Yours truly,
Pint-Size Baker

Thursday, November 26, 2009

Happy Thanksgiving!!!

I just wanted to pop in and wish you all a very Happy Thanksgiving! Today was a great one spent with my family, my sister's boyfriend, and all of the animals. I'm so thankful to have all of them in my life along with amazing friends, food on the table, and a roof over my head. God has truly blessed us.

Hope you were able to spend today with those near and dear to your heart!

<3,
Pint-Size Baker

P.S. Please see below for a snippet of the day's adventures...

Thursday, November 19, 2009

Baking Adventure #8

First off, I am so sorry for not delivering your eyes with scrumptious baked goods the past couple of weeks. Life has been beyond busy and amazing and up and down. Here's a little update for ya:

My best friend and her husband came to visit for a long weekend this past weekend, and I couldn't have asked for a better time with them. I got to show her where I live (this was the 3rd time we had seen each other in 10 years mind you) and introduce her to some of my dearest friends/the loves of my life... (in addition to going to a GREAT concert put on by Phil Vassar and opened by an up-and-coming artist named Jason Jones) My heart was beyond full this past weekend. It was a little (insert: A LOT) tough when they headed home on Sunday, and feels like a piece of me is missing. However, I thank the Lord for the time we got to spend together.

[Pay no attention to Mimi Bobeck in the background.]

This week has been interesting to say the least, and it has included the possibility of my sister's attack case finally coming to a close after 2.5 years. Unfortunately, it did not come to a close just yet... To be continued on December 17th. (Check out her blog for more information on the attack and her perspective on things. She is one of the most amazingly strong people I know)

Anyways, so is life. It has its UPS and its downs, but at the end of the day we are left with God's love and our family and friends.... it's quite comforting to know those will always be there. So, in light of the comfort of love, I have decided to make this week's baking adventure be one of the most comforting things to me. It's a recipe I took 2 years to develop and perfect. I don't quite have a name yet; however, there was a suggestion for "Sweet Ashley's Choco Chip Cookies"... any thoughts?

and without further ado, this week's baking adventure is...


Sweet Ashley's Choco Chip Cookies!!!

Let me preface this adventure by saying that the recipe will not be linked to or given out on this blog as it is TOP secret and these cookies will be sold to many one day! :-)

So, first things first! PREP!

[Na na na boo boo! My secret ingredients are missing from the above picture... so sad, too bad! hehe]

Next it's time to separate dry and wet ingredients in their bowls and then combine in one big bowl.

[This is the only picture of the middle part of the process you get to see. hehe.]


This recipe itself wasn't much of an adventure since I had all of the ingredients already and have made them close to 50 times already. The adventurous part is going to be allowing new people to try them who haven't in the past. Even though, I already am pretty confident in their deliciousness, it makes me nervous each time someone new tries them. I think "Are they going to like the taste? Will my secret ingredients agree with their taste buds? Are they just saying they like them or are they just trying not to hurt my feelings?" Call it paranoia or what have you, but I love baking for people and if they don't enjoy something, I feel bad, almost guilty, for asking them to try it.

That being said though, I can pretty much guarantee that if you enjoy chocolate chip cookies, you will thoroughly enjoy these. In fact, people from North Carolina back in college still request them on occasion. :-)

Sorry to go off on that tangent... behold the final product of two years of experimenting to get them "just right"...


Hope everyone has had a great past couple of weeks! Until next time folks!...


P.S. Any suggestions on what to bake for Thanksgiving? Pumpkin pie? Apple pie? Pumpkin Cheesecake? I can't decide! Help!

Wednesday, November 4, 2009

Grocery Stores Count

We interrupt [Did you know interupt has two r's? Gotta love spell check] this week to bring you one of my new favorite songs/video introduced to me by none other than Meredith. If you've never heard Michael Buble's music before, I would HIGHLY recommend listening to the rest of his songs and watching his videos. His newest, "Just Haven't Met You Yet", is beyond superb!

Ok, so I realize this really has nothing to do with baking. However, he is in a grocery store (one of my favorite places), so it indirectly pertains to this blog. Pleasant viewing!

Sunday, November 1, 2009

Baking Adventure #7

Buon giorno! SO sorry I neglected to post a baking adventure last week, but I'm back now and baked double this weekend to make up for it!

One of my friends/brother-from-another-mother/guy from the cigar shop has been requesting this week's baking adventure for well over a month. He is a connoisseur of this given baked good; however, I've been putting this off accidentally-on purpose, as I am not a fan of these nor have I ever made anything close to them before. BUT, I am not one to turn down a challenge or request from someone who matters to me, so I spent the last couple of weeks researching (in my spare time, don't worry boss-man) and locating the best base recipe so as to add my own twist on an otherwise simple project. Thus, without further ado, this week's baking adventure is...


(These were influenced by Kashi's Cherry Dark Chocolate Granola bars, but most people think Ben & Jerry's Cherry Garcia... it's up to you which you prefer to relate them to.)

Conveniently, about a week ago I was watching an episode of Good Eats on the Food Network, and Alton Brown was making biscuits from scratch. During the episode he referenced how biscuits and scones are directly related to one another, and that got my mind rolling. What better person to get a basic scone recipe from than the very man who turns cooking/baking into a science and dissects each part??? He MUST have a good recipe for them! As luck would have it, his scone recipe contained over 100 reviews, almost all positive. I decided to give it a try as it was a base recipe from which you could add as many flavors or no flavors if you so choose.

Upon reading through the recipe, I noticed it doesn't give much description on what to use to bake the scones on (when in doubt, use a well greased cookie sheet) nor does it tell how the consistency should be. In addition, the ingredients called for "cream". It didn't specifically say what kind of cream... for such a simple recipe, this was going to be interesting! I had almost all of the ingredients in my cabinet except for the elusive "cream" and the dried cherries and chocolate chips. I was also going to be making another batch of the Blueberry Cornbread for my dad as a surprise, which called for Buttermilk, so while at the grocery, I phoned my mom and best friend (reference Baking Adventure #4) to ask if I could just purchase "cream" or Buttermilk and use one for both. After talking it out with Meredith, I decided "cream" would be the best option. (PROBLEM #1 SOLVED)

Here's where problem #2 came in... "CREAM" What kind of recipe just says "cream"? If you go to the grocery, you'll likely find (like I did) about 6 brands of "heavy whipping cream", one brand of "light cream" but not one single brand of just "cream". [Time to pick up the phone again.] Mom said they were different, but I opted to quit wasting time and grabbed the heavy whipping cream... it's dairy and "heavy" ... "cream"... it must work! [aka I WILL MAKE IT WORK, as I am the Pint-Size Baker after all!]

Back home, it was time to get to baking. First things first per usual... PREP!

(Neglected to put the salt in this photo but you can pretty much assume that salt will always be in a baked good unless otherwise noted. Salt helps bring out the flavors of the baked good.)

This recipe contained the SHORTEST list of directions out of any thus far, and it was pretty easy to conjure up. First you start with separating the dry and wet ingredients in their respective bowls. (DO NOT combine the two yet) Then, you cut the butter and shortening into the dry ingredients. Make sure the butter is super cold and cube it to make cutting into the dry ingredients a little easier.

(Tip for cutting butter/shortening into dry ingredients: it's best to either use a fork or your hands. I started out with a fork but it just wasn't doing the trick, so I used my hands. Don't over do it b/c the heat from your hands will melt the butter and you want a crumby texture [see photo] as your final result.)

After cutting the butter and shortening in, it's time to add the cream/egg mixture and stir until all ingredients are blended, but don't over work it.

Then, fold in whatever additives you so choose. The recipe says to add a "handful" as a good measurement for how much to add. However, I have a feeling my "handful" is about half the size of Alton Brown's (was once told I have "opossum hands"), so I added 2 handfuls of each. It worked out just fine!

Next was time to flour the counter and rolling pin and roll out the dough, then cut into round shapes and bake.

Next time I make these (if there is a next time), I will cut into triangle shapes, as the scones resemble more of a cookie or biscuit when they're in a round shape. (Remember, people eat with their eyes first!)

All in all this recipe was SUPER easy to make and quick too! Some takeaways for the next time include:
  1. Add a touch more sugar than the recipe calls for as they were just under-sweetened.
  2. Cut into triangle shapes instead of circles.
  3. Egg-wash and sugar the tops before baking.
  4. "Heavy Whipping Cream" and "cream" are interchangeable. There is a slight difference in the fat content but overall, the flavor and consistency are pretty similar.

That's pretty much it! Oh! and in case you were wondering, the Blueberry Cornbread turned out great! I added a touch more sugar than last time and substituting the cream for the called-for buttermilk made little difference. In fact! I prefer the flavor of the cornbread with the cream to that of the one with the buttermilk.

Until next time my friends!!! Have a wonderful week!

Tuesday, October 27, 2009

Week off?

Not so much.

Hello to all of my lovely readers!!! (all like 5 of you, including family)

Sorry to disappoint as there is no Baking Adventure blog from this past weekend. {Insert sad, depressing music here} I did bake some Snickerdoodles for another paying customer (aka close family friend). However, we've already endured that adventure together, and thus I decided not to deliver a repeat to you.

Instead, I've been continuing my search for the "perfect" scone recipe and have settled on one from Food Network's own, Alton Brown! Stay tuned next Sunday for the post, as my "brother" has been requesting these for about a month now! It should be a good turn out... well HOPEFULLY they turn out well!

Until then, have a wonderfully delicious week!

Sunday, October 18, 2009

Baking Adventures #5 and #6

This week one planned baking adventure had an unplanned addition as well! There was a tie between Cake and Apple Pie for the Pot Luck dinner for tomorrow night's class, so I went with the Apple Pie. My cousin Angie sent her recipe over and it seemed pretty simple. Why not conquer something that intimidates and scares us but could end up wonderful? What's the worst that could happen? Life is all about taking chances and risks.

Now, before I dive into the "planned" baking adventure, let's discuss the "unplanned". Yes, I did use protection... haha, ok bad joke...

Saturday morning was spent doing laundry at my parents' house (no washer and dryer = borrow mom and dad's). While there, I resumed my usual position in the kitchen watching Food Network (my crack) in between loads. However, I got an inkling to bake and started looking through the cabinets... what did I find??? All of the ingredients to make yellow cupcakes!!!

Ok, so cupcake pan, liners (yes, I have a secret love for Winnie the Pooh), and batter ingredients: CHECK! Frosting?........

Frosting is a necessity if you're making cupcakes; Mom had all of the ingredients but one to make cream cheese frosting and all of the ingredients but one to make regular frosting... so I decided to get creative and combine and make my own...

After combining butter, cream cheese, sugar, one Starbucks VIA Columbia roast, and 1/4 cup Godiva coffee liqueur... I ended up with COFFEE LIQUEUR Frosted yellow cupcakes:

I had my dad taste test and he thoroughly enjoyed the frosting. However, I wasn't so much a fan... too much liqueur flavor for me, so I decided to get creative again and combined butter, cream cheese, sugar, brown sugar, and cinnamon for CINNAMON/BROWN SUGAR Frosted Yellow Cupcakes:


TA DA!!! These went to my guys at the Cigar Club for some taste testing as well as a couple other close friends. I was a bit nervous as to what my taste testers would say since both frostings were an experiment, and unless everyone lied, they really enjoyed the cupcakes. So it was a successful experiment!


Ok, time for the planned baking adventure:


COUSIN ANGIE'S APPLE PIE

First things first: PREP! This recipe was relatively simple as far as ingredients go. The only two things I needed were nutmeg and apples.

Slicing the apples into thin slices wasn't too bad either.

HOWEVER...

Figuring out how to pile all 6 sliced Golden Delicious apples into the pie pan was a FEAT in of itself.

(Let me let you in on a little secret: I didn't make the pie crust from stratch.. GASP!!! I know, bad Pint Size Baker, bad! However, upon reading through many recipe reviews and advice from my Cousin Angie, I opted to buy Pillsbury pie crust as it is supposed to taste just as good if not better than something I could make on my own. This I will be trying to overcome at a later date though.)

Once all of the apples were piled a mile high in the pie (haha, poet and don't know it!), it was time to add the crumb topping. So sorry there is no photo of this part of the process but my hands were covered in sugar, flour, and butter and there is no Pint Size Baker assistant just yet.

Apple Pie assembly? CHECK
Oven Pre-heated to 425? CHECK

TIME TO BAKE!!! (Little hint: Once you notice the top/crust start to brown, cover with aluminum foil to prevent burning. Also, it's a good idea to place the pie pan on a baking sheet in the event that anything drips or falls off while baking and makes it easier to pull the pie in and out of the oven.)


Now, I'm not sure how this tastes yet as it is for Pot Luck Dinner at my RCIA class tomorrow night, but I'll check back in afterwards and let you know how the reactions are from everyone!

Tuesday, October 13, 2009

Need Your Help!

So I am having trouble deciding what to bake for our Pot Luck dinner for next Monday's class. The trouble being that baking a pie is a little intimidating as I've never made one from scratch before.

This is where you come in! Please vote below, and whichever option wins by Saturday evening, I'll bake! Thanks in advance for your help! If you have any other suggestions besides the two listed, feel free to post them in the comments section.

Sunday, October 11, 2009

Baking Adventure #4

This week's baking adventure is dedicated to one of my dearest and best friends in the world, Meredith!

We met way back when in 6th grade and neither distance nor time has keep us apart. She is one of those rare friends who you can go years without much communication, and then it will seem like no time has passed when reconnecting. (However, don't steal her napkin or she'll get mad at you for entire day! hehe) We both share a pet peeve for bad grammar, the desire to be as healthy as possible while still enjoying amazing food, love for good family, and most importantly... a PASSION FOR BAKING!

Meredith is an amazing decorator! I, however, am not. I prefer the more rustic baked goods as my patience for decorating is minimal. Meredith has an amazing talent that's only just begun, but her modest self would tell you otherwise... You be the judge:

[Elmo cake picture courtesy of a facebook album of hers. Hope you don't mind!]

Due to the purpose behind my passion for baking being the joy it brings to people, it seems only appropriate to dedicate this blog to her, our friendship, the joy she brings to my life, and her amazing recipe for...


HUMMINGBIRD CUPCAKES!!!

This week's baking adventure is Meredith's version for Hummingbird Cupcakes. Typically, this recipe calls for a good bit of sugar and is on the unhealthy side. However, Meredith, the baking genius she is, made a healthier version that's just as delicious and not overly sweet.

What's a Hummingbird Cupcake you ask? It includes banana and pineapple in the cake batter and a (reduced fat) cream cheese frosting. Upon researching the reasoning behind the name for this cake, I came across some interesting symbolism behind and facts about Hummingbirds that coincide with our friendship as well as the way we both view life.

Pulled from http://symbolism.wikia.com, the Hummingbird is "a symbol of love, joy, and beauty. The Hummingbird is also able to fly backwards, teaching us that we can look back on our past. But, this bird also teaches that we must not dwell on our past; we need to move forward. When the hummingbird hovers over flowers while drinking nectar, we learn that we should savor each moment, and appreciate the things we love."

Everything happens for a reason, and our past shapes who we are today. Today is a gift, that's why it's called the present. Your friendship is a gift to me Meredith, and I'm so glad to have you in my life after all these years! This recipe is beyond appropriate and so let's begin the adventure...

First things first, Prep!


Next it was time to combine the dry and wet ingredients in their respective bowls and then blend together. Typically, I whisk and stir everything by hand. However, I pulled out an electric hand mixer given to me by an old friend (Thanks Carrie O!) to help speed up the process of the cupcakes. (TIP: If using an electric hand mixer, make sure you twist the bowl 360 degrees a few times while mixing in order to blend the ingredients completely.)

After the wet and dry ingredients were combined, it was time to fold in the smashed banana, crushed pineapple and some cinnamon. (Side note: I halved this recipe as I was just baking for the sake of the adventure and not for a party. It typically makes around 15-20 regular size cupcakes.)

After folding in the banana and pineapple, I spooned the batter into lined cups of the mini muffin pan. (Mini muffin sizes make it easier to share with lots of people!) If you want the cupcakes to puff up over the sides a bit, fill the cup liner up to about 7/8 of the liner itself. I highly recommend this as it creates a great shelf for holding the icing once the cupcakes have cooled.

While the cupcakes are baking in the oven, it's time to make the frosting! For me this is the best part of any cake or cupcake, and I judge baked goods based on the frosting alone if they call for it, i.e. birthday cake. If the frosting is subpar, then chances are I will not eat the cake part either. Yea, yea... maybe I'm a little judgmental but come on! Who doesn't agree that frosting is the best part?

{This is what happens when you neglect to lock the whisks into place in the electric mixer. Oopsy!}
After the frosting was prepared and the second batch of cupcakes were in the oven (I only have one mini muffin pan, so it took 4 batches to get all of the batter baked.), I began to ponder how to make the Hummingbird cupcakes a little more fun, if you will. Sure, they're going to be delicious, but we eat with our eyes first before with our mouths. The frosting was white and so were the cupcakes themselves, and to me, white on white just is a little boring. So I had an "AH HA!" moment and decided to go get some food coloring. However, I still had another batch to bake. Well, this is the adventure part...

While the 4rd and final batch was in the oven, I SPRINTED down the elevator, out the doors of my building, across the parking lot of the grocery, down the baking aisle, grabbed the food coloring, ran to the checkout (where someone yelled "RUN FOREST RUN!" to me), paid, and ran back through the parking lot, through the doors of the building, back up the elevator, and back home. Yea, I know you're never supposed to leave the oven unattended... but shhh, just don't tell anyone k? It'll be our little secret AND I arrived with about 5 minutes to spare left in the baking.

Once I got the proper coloring in the frosting (I went with orange), it was time to frost the cooled cupcakes. This is when the pretty simple cupcake recipe road turned a little curvy and bumpy. As a result of my hot kitchen (lots of heat + small areas = hot kitchen... need a better ventilation system) and the thinner frosting resulting from the food coloring, I had a bit of a mess upon piping onto the cupcakes and had to stick them in the freezer/fridge to set. These weren't the prettiest of my creations, but they were quite tasty!


After the cupcakes were baked and frosted, I was off to my first group of taste testers: the Buckhead Cigar Club family. While there, I got my second request for more Snickerdoodles and a glass of wine in trade for a cupcake! I'd say this baking adventure was a success!!!

Thanks so much Meredith for the recipe and your amazing unconditional friendship and love throughout the years! I cannot wait for N&T to become a reality!

That's it for this baking adventure! If you're curious as to the recipe, please let me know (comment section below) and I will check with Meredith and see if sharing is allowed. If not, you can always place a request in the comment section below as well and I'd gladly bake you some! ;-)

...Until the next baking adventure folks!

Sunday, October 4, 2009

Baking Adventure #3

Have you ever spent 20 minutes at the grocery searching for one item? This hasn't happened to me for quite some time as the grocery and I are BFFs; however, Friday night proved otherwise...

Upon looking over the recipe, I noticed that most of the ingredients were pretty common and thus, have most in my baking cabinet already. However, I was running low on sugar, eggs, and butter, and had not yet added vegetable shortening or Cream of Tartar to the mix... so it was off to the grocery for this Pint-Size Baker.

Once down the baking aisle, the sugar and vegetable shortening were a quick find. However, Cream of Tartar was no where to be found. Maybe I should've done a little more research before going to the store because I didn't even know what it looked like. It could have been a solid, a liquid, a powder type substance... I had NO earthly idea. After about 5 minutes of searching the aisle, I decided to go to customer service and ask for their helping in finding Cream of Tartar. "Excuse me, where can I find the Cream of Tartar?" I asked. "[With a little chuckle] You can find that down aisle 6, where the condiments are," the lady at the counter explained. So off I went down the aisle giving her the benefit of the doubt for knowing what Cream of Tartar was... yea that was a mistake. She thought I meant Tartar Sauce! After laughing to myself, I started back towards the baking aisle and ask a fellow customer if she knew what it was/looked like. She explained that it would be in with the spices. AH HA! That narrows it down significantly! Back in the baking aisle, I began to scan the 8374238472634 spices for Cream of Tartar... typically they're placed alphabetically, but I wasn't sure if it was under "C" or "T". There was another gentleman in the aisle not having any luck finding what he needed either, but I decided to see if he knew where it would be. He immediately goes "one second!" and went down the soup aisle. While he was in the other aisle, I ended up finding the Cream of Tartar on my own and then found him to let him know. Well, guess where he thought it would be... in with the Cream of Mushroom and Cream of Chicken soups... This was quite a start to the third baking adventure!


Ok enough story time... time to get down to business and let you in on what was on the agenda for this week's baking adventure...


If people don't know what these are, they're basically sugar cookies on crack! Buttery, cinnamon and sugar goodness! I would highly recommend baking these as they're super simple and very difficult to mess up if you follow the recipe. My biggest challenge in baking these was mixing and baking double the normal batch...

Why did I bake double you ask? Well, I had my FIRST PAYING CUSTOMER!!! :-D WOOHOO!!! In my ideal world, this little baking hobby would turnout to be lucrative at the same time. Who doesn't want to be paid for doing what they love? :-)

The first step in the process is always PREP. The ingredients are pretty minimal for these cookies and are mostly common, household pantry items. Please pay no attention to the vanilla extract in the picture below. It decided to jump in uninvited to the Snickerdoodle Cookie party. Bad Vanilla Extract, Bad!

The recipe calls for sifting the dry ingredients together in one bowl and blending the wet in another per usual. This was the easy part...

After the two bowls contain their corresponding ingredients blended together, it was time to add the dry into the wet. Well, if you're like me and don't have an electric mixer or anything besides a spoon and your hand, this is QUITE the workout and leaves a nice red hand afterwards.

Once the dry ingredients were combined with the wet, it's time for the fun part! Make little balls of dough and then roll them in the cinnamon and sugar, place on baking sheets and bake for approximately 10 minutes. A tip for the balls of dough is to roll them in between the palms of your hands (make sure you wash them) like you would making balls of play-dough when you were little, and then place in the cinnamon-sugar and take a spoon and spoon the cinnamon and sugar on and around the dough. Try and minimize the amount of time your hands/fingers touch the cinnamon and sugar as you will start to stain the raw dough, and with these cookies, it's important not to blend those two parts together.

This recipe is supposed to produce approximately 4 dozen cookies (or 48 total), but since I was doubling the recipe, I ended up rolling, cinnamon-sugaring, and baking 106 total cookies!!! Needless to say, I got a great workout and my kitchen and apartment were quite toasty when done! In fact, the apartment thermostat said 81 degrees when I was finished and it was on 74 when the adventure began.

After the cookies were cool, I packaged up 48 of them for my paying customer and put the rest in my regular tupperware to share with family and friends. Then it was off to deliver the Snickerdoodles to the paying customer and watch my Irish kick some football butt!

That's it for this week folks, please leave comments below OR if you want to be my SECOND paying customer, please inquire within! ;-)


Next week's adventure has already been determined and I can't wait! One of my best friend's has shared one of her favorite recipes with me, so next week will be a dedication to her and her shared love of baking!